Below are the short tutorials on how to A. Set Receipt Address B. Create A New Branch C. Create New Inventory Location
A. Set Receipt Address
If you would like to have your receipt displaying company name, company address and phone number. Below are the steps:
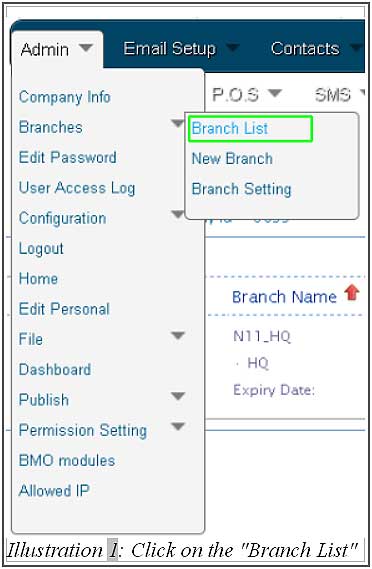
1. Go to “Branch List”(Admin > Branches > Branch List)
Please click on image to view clearer.
2. The screenshot below shows the branch ID and branch name without address, click on the “Edit” link.
Please click on image to view clearer.
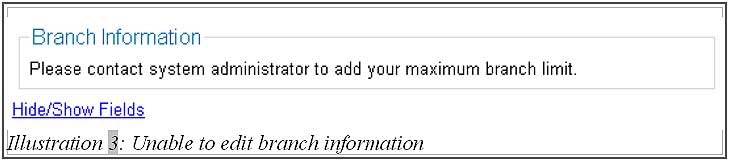
3. If message below is displayed, it means that you do not have the rights to edit the branch information. So, you must contact your system administrator to request for additional branch limit.
Please click on image to view clearer.
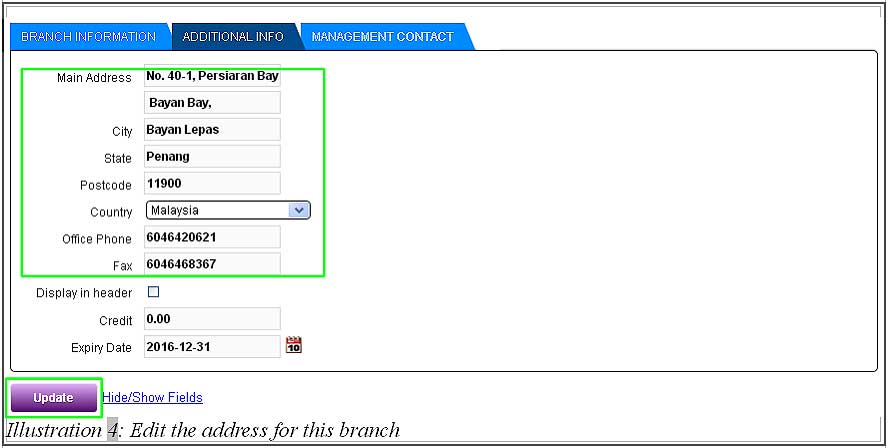
4. After the branch limit is added (by system administrator), you can go to click “Edit”. Then, click on the “Additional Info” tab so that you can enter the address for this branch. Click on “Update” button once you have finished entering the details.
Please click on image to view clearer.
5. Once the branch info is successfully updated, the address will be displayed in the receipt for offline POS Terminal.
Please click on image to view clearer.
B. Create A New Branch
1. To create a new branch for a company, go to “Branch List” (Admin > Branches > Branch List).
Please click on image to view clearer.
2. Then click on “New Branch” button.
Please click on image to view clearer.
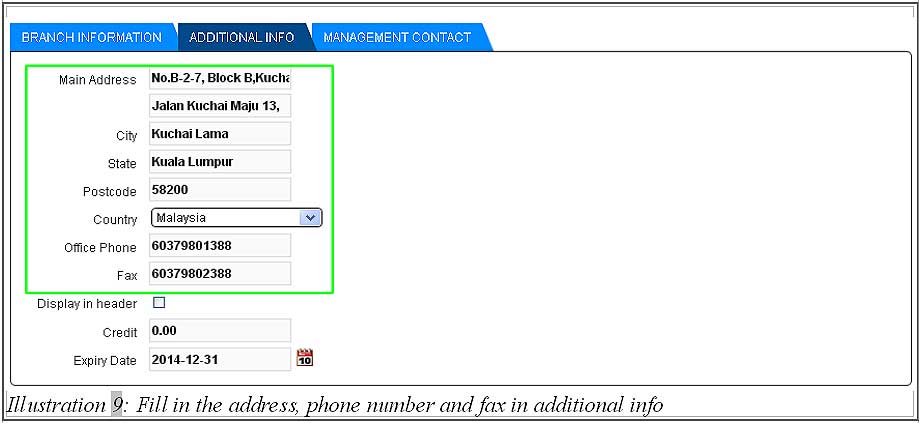
3. Firstly, fill in the details in branch information. Secondly, fill in the address, phone number and fax under “Additional Info” tab.
Please click on image to view clearer.
Please click on image to view clearer.
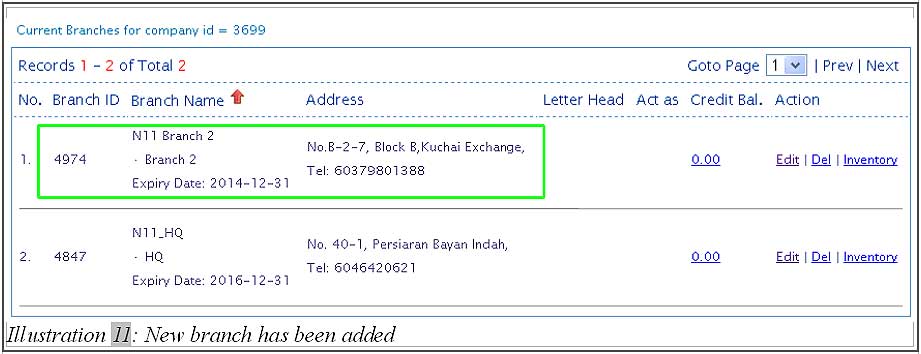
4. Finally, fill in the details under default inventory location and then click on “Save” button. After saving, a new branch will be displayed in the branch list.
Please click on image to view clearer.
Please click on image to view clearer.
C. To Create New Inventory Location
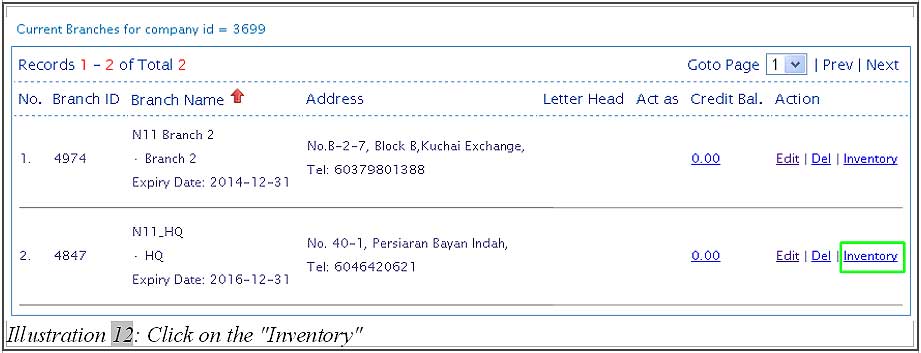
1. To add another inventory under a branch, you must select the branch, then click “Inventory” under the “Action” column.
Please click on image to view clearer.
2. After that click on “New Location” button.
Please click on image to view clearer.
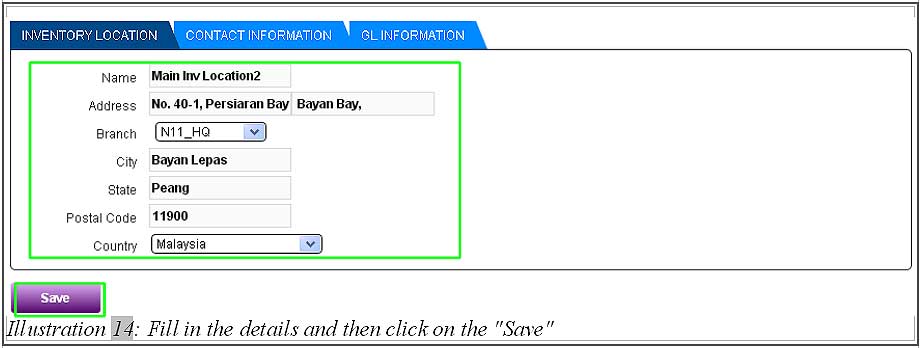
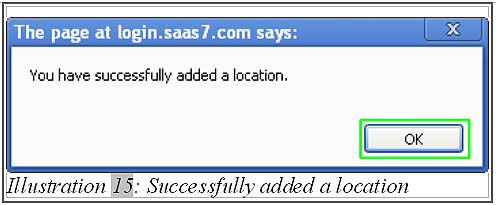
3. You must fill in all the details such as name, address, country and branch under “Inventory Location” tab, then click on the “Save” button and click “OK”.
Please click on image to view clearer.
Please click on image to view clearer.
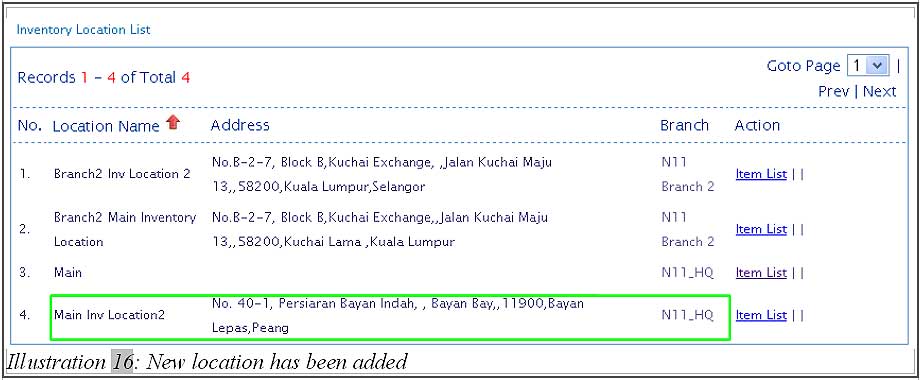
4. After you have successfully added an inventory location, the new branch location will be displayed under Inventory Location List.
Please click on image to view clearer.
To continue, please click here to refer item 3 – How To Create And Edit Group Permission in Online POS System.